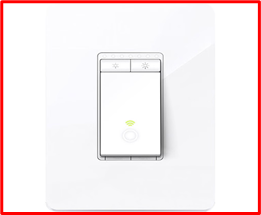
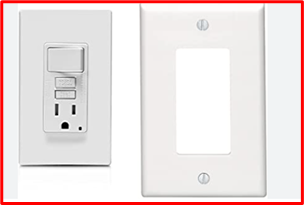
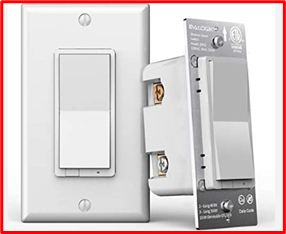
Dimmer switches are straightforward electronic devices that are used to regulate lighting brightness.
Whether it’s to control lighting, save energy costs, or add extra security, dimmers are a common installation among homeowners.
Dimmer switches are simple to install by electricians or by persons who are familiar with connecting this kind of equipment.
How They Work
Understanding how a dimmer switch works will help you utilize it more effectively and achieve the greatest outcomes. Dimmer switches, depending on the type, work on basic electrical principles.
A basic dimmer switch reduces the amount of power flowing through a circuit to reduce the brightness of a light. Modern dimmers, however, operate in a different way.
To switch on and off a light, modern dimmers employ the electricity already existing in the circuit. When this happens, the light bulb’s electricity is diverted.
Every time you use a dimmer switch to brighten or dim the lights, the direction of the electrical flow is changed. It automatically switches the circuit on or off when it alternates.
PDFs / Technicals
GE Dimmer Switch Technical and Diagrams
Leviton Slide Dimmer and Wiring
How To Install a Dimmer Switch
There are two standard wiring arrangements for dimmers which are: two-way single pole dimmers and three-way single-pole dimmers.
A single switch operates a single light when using a normal two-way dimmer. You can regulate a light from two different locations using a three-way dimmer. One three-way dimmer and one three-way switch are required for this. This allows you to dim one area while turning on and off lights in another.
The only thing that is being done when a dimmer switch is installed is adjusting the amount of electricity that flows to a light, which causes it to dim at a low setting and become fully brilliant at the highest level.
A typical circuit now includes a 3-wire cable known as Romex. The cable consists of a black wire, a white wire, and a bare copper wire.
Black wire = Power or Hotwire
White wire = Neutral
Bare copper = Ground
All we want to do when constructing a dimmer switch circuit is control the black wire (hot wire) to dim or brighten the load. The straightforward diagram below will help you better comprehend what this circuit is doing.
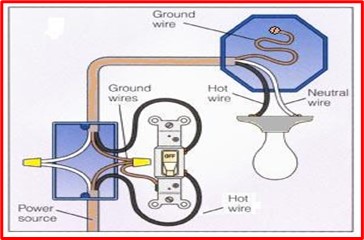
In the diagram, the power supply enters from the left. As you can see, the 2-way switch is solely being used to control the black wire. It doesn’t matter if you use a brass or silver screw; you have a black hot wire coming in that goes to one screw on the side of the 2-way switch, and a black wire coming from the other screw on the 2-way switch that goes to the load (light, ceiling fan e.t.c).
Regarding the ground wire now. The ground wire must also be connected to the switch, which is crucial. All ground wires should be connected as shown below since the green screw on the 2-way switch is for the ground.
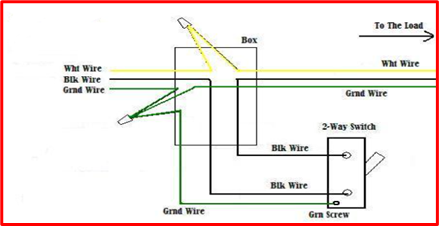
All ground wires (bare copper) are now connected (incoming ground, load ground, and switch ground). This makes for a safely protected circuit by having all grounds intact.
Advantages Of Upgrading
- Because we all use fewer watts when our lights are dimmed, dimming our lights will result in energy savings on our power bill. This might save 18–20% on our lighting bills, depending on how many rooms in our home use dimmers and how frequently we dim the lights.
- Another advantage is that light won’t have to work as hard when they are dimmed, which will make them last longer. Depending on the bulb, this may not be accurate, however lowering the lights can double or triple the lifespan of a regular light bulb.
- The look and feel of a room can be controlled. The lights in a room are preferred bright while cooking dinner, but the living room is a different story. You may want to dim the lights while watching TV but turn them back up to read a book. The dining room, family room, and bedrooms are also great places for lights with dimmers switches
Dimmer Switch Top Picks
- TP-Link Kasa Smart Wi-Fi Light Switch Dimmer HS220
This type of dimmer switch connects to your home Wi-Fi network directly. It has three buttons (for dimming and turning on/off) and looks nice on your wall.
You can use the Kasa app to set automated schedules and control groups of switches. It also enables you to configure the dimmer to respond based on how you touch it. So a long press or double tap, for example, can turn the switch on or off instantly, direct it to fade to off, or direct it to move to a favorite preset dimming level.
- Monoprice Stitch Smart In-Wall On/Off Light Switch with Dimmer
It also has built-in Wi-Fi. It’s also a fantastic option for folks who want something dependable and economical but don’t like the Kasa Smart HS220 dimmer’s three-button style. Most people prefer the Kasa app and some of the extra functions it provides, but the Monoprice Stitch is simple to use.
- Enbrighten In-Wall Z-Wave Smart Dimmer
If you already have a smart home that supports Z-Wave devices, choose this type of dimmer, It requires the use of a Z-Wave smart-home hub and is compatible with many of the most popular hub models, including those from Ring, Vivint, Wink, Honeywell, SmartThings, and HomeSeer. It’s also the easiest-to-use, least expensive Z-Wave dimmer providing remote control, customized scenes, and scheduled use, so you can turn the lights on and off at set times of the day.
Useful Resources
Phase Monitoring Relays: How They Work
Voltage Drop Calculator and Formulas Explained
Control Systems: Open Loop vs Closed Loop
Dead Shorts, Short Circuits and Ground Faults
